After having
downloaded the 1.3 GB installation package, I finally got around to installing
SQL Server 2012 Express Edition.
I was pleasantly
surprised that the process for installing SQL Server 2012 went relatively smoothly.
For those that remember the process under SQL Server 2008, the wizard that took
forever to load would keep sending you to site after site for one prerequisite
after another. After installing one prerequisite, you’d have to go through the
process from scratch, only to have the wizard tell you that you’re missing
something else.
Fortunately, nothing
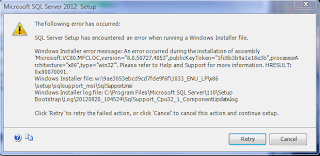
like that happened during my installation of SQL Server 2012, but I did get a
couple of interesting message boxes along the way.
The entire process,
however, took more than two hours. I will be the first to admit that the
computer I was using was anything but top of the line, but it’s hardly a
clunker either. One note for prospective installers and installeresses is that
it is my understanding that SQL Server 2012 will not install on Windows XP. If
you’re lagging behind on technology, you’ll have to stick with SQL Server 2008.
Once the installation
process completed, you will first notice that the UI for Management Studio is
patterned after Visual Studio 2010. IntelliSense, which is a common feature in
recent Microsoft development environments, is also included, as it was in the
SQL Server 2008 Management Studio. I find it useful, but annoying at times. I
presume that there is a way to turn it off and I’ll find it if I find that it’s
getting too annoying for me.
My next step was to
install Books Online (BOL), but the staple of recent SQL Server versions is now
part of the Microsoft Help Viewer. When you first start the Help Viewer after the database engine installs, all you’ll
get is a picture of a cow eating grass. To install the full content, start the
Help Library Manager and choose Install Content from Online. The installation
of the help modules took over an hour.
Nonetheless, after a
lot of disk grinding, everything installed properly and I have a
fully-functional database server complete with local help.
The handy “pubs”
database no longer comes with SQL Server, so I downloaded the AdventureWorks
database. Microsoft only provides you with an .mdf file, so you have to attach
it to your server using a wizard within Management Studio or a T-SQL command similar to the following:
CREATE DATABASE
AdventureWorks2012
ON (FILENAME =
N'c:\program files\microsoft sql
server\mssql11.sql2k12\mssql\data\AdventureWorks2012_Data.mdf')
FOR ATTACH_REBUILD_LOG
If you choose to use a
directory other than the one that SQL Server creates during the installation
process, however, you will have to manually assign rights to the service on
that directory.
I copied my .mdf file
to a different directory and kept receiving an “access denied” error message.
After some digging, I found the service name in the access control listing for
the SQL Server data directory, but if you want to assign it manually for any
other directory, you must specify “NT SERVICE\MSSQL$SQL2K12”. Replace “SQL2K12”
with the name of the instance you specified in the installation.
Having
heard about the many new features of SQL Server 2012, I’m looking forward to
seeing how they work for myself.


No comments:
Post a Comment